+420 605 721 828

Being a tax advisor is a hard job – Mr. Podlešák spends up to 14 hours at the computer dealing with hundreds of thousands of figures every day. So to relax he goes down to his
workshop in the basement…
More
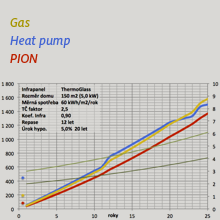
Comparison of costs
for heating
Be a handyman round the year.
Being a tax advisor is a hard job – Mr. Podlešák spends up to 14 hours at the computer dealing with hundreds of thousands of figures every day. So to relax he goes down to his
workshop in the basement…
More
Comparison of costs
for heating
Now it's really safe for the kids
to play on the floor.

Two months testing showed good results: The floor stayed warm and neither Johnny nor Veronika had even once a cold even though the winter was harsh…
More
Comparison of costs
for heating
Walking around the flat just in your T-shirt in winter! That’s real indoor climate comfort!

Mr. Ševčík lives in a 3 bedroom apartment in a beautiful mountain town Lázně Libverda 550 m above sea level, which doesn’t mean just
beautiful environment but
also harsh winters with
outside temperature often
falling below -20 °C…
More
Comparison of costs
for heating
A retired couple has finally found a convenient & cost-effective heating solution for their mountain cottage
More than 20 years ago a couple from Prague fell in love with the nature of the Jizera Mountains. That’s
why they decided to build
a nice cottage there…
More
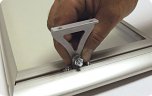
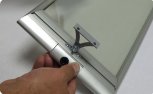
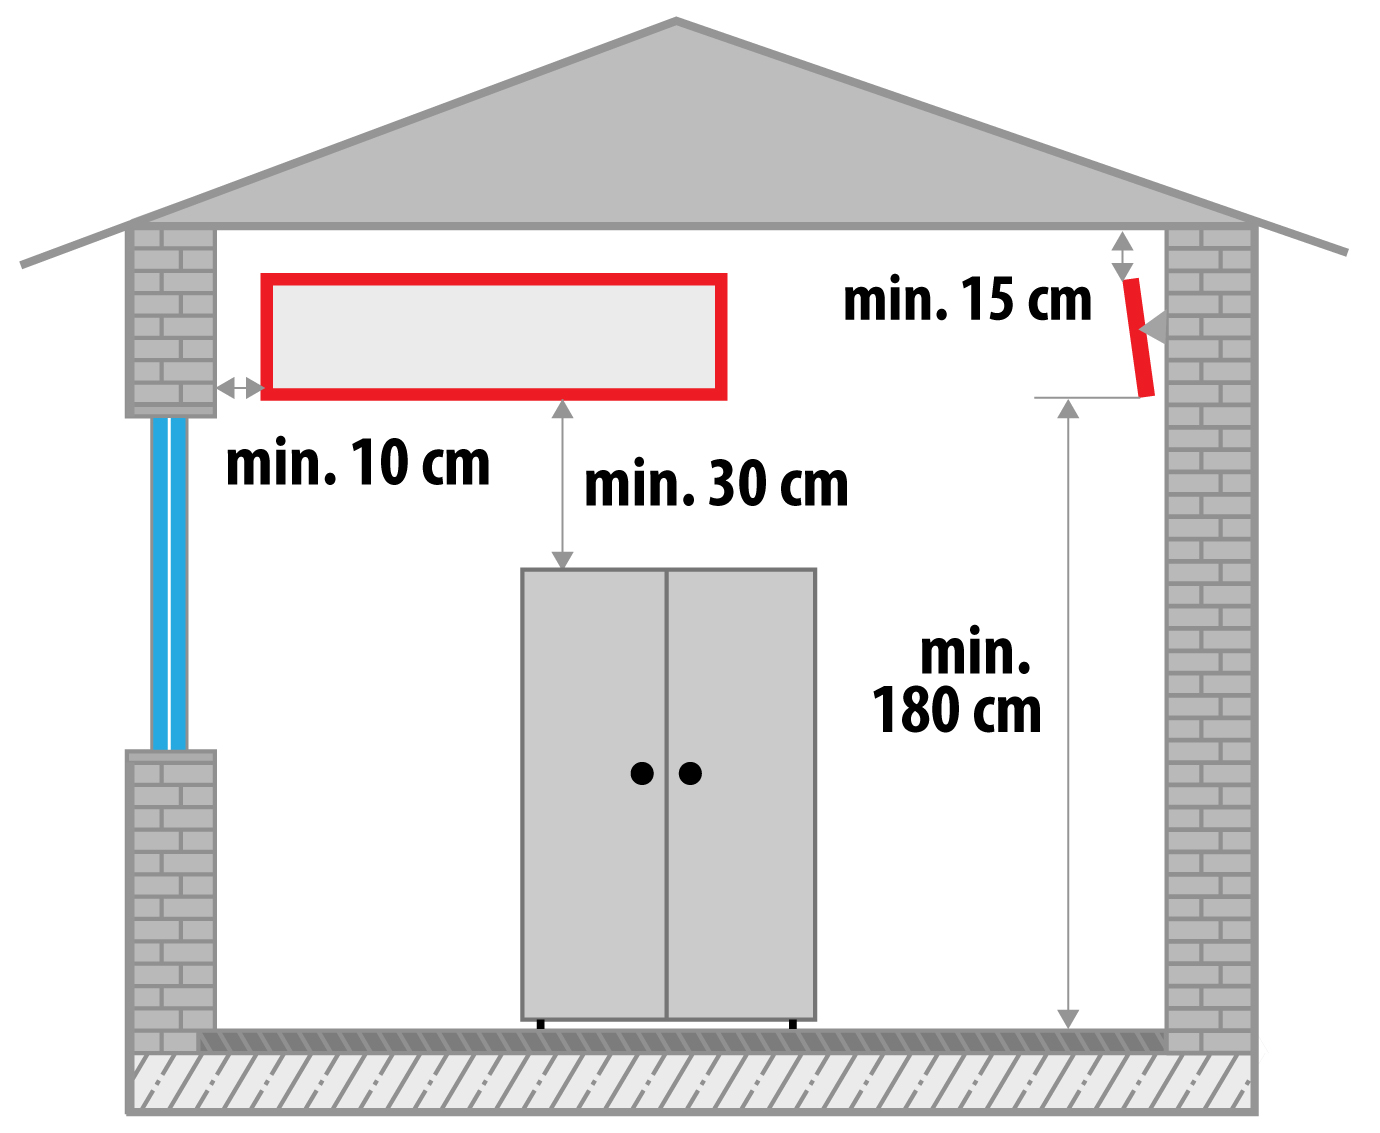
PION ThermoGlass infrared heater should be best installed on the ceiling or wall of a room. The heating side of the panel heats up to 240 °C evenly radiating heat rays and heating up the surrounding surfaces which then use the accumulated heat to warm up the surrounding air. The vertical distribution of heat differs from conventional convective heating; air close to the floor is warmer than air at the head level of a standing man, thus one feels very comfortable.
The fastening of the heater either on the wall or under the ceiling is designed to provide an air gap between the panel and the supporting structure. Despite that the heating panel reaches up to 240 °C, thanks to the unique thermal insulation and a special layer reflecting infrared radiation the temperature of the rear side of the panel does not exceed 80 °C and the supporting structure is thus protected against overheating.
| Use clean textile gloves when manipulating with the heater. Avoid touching the heating glass surface. If the heating surface or the supporting or insulating elements are soiled immediately clean the spots with alcohol or glass cleaning agent. | ||||
|
|
|
 |
|
|
|
|
|
|
|
|
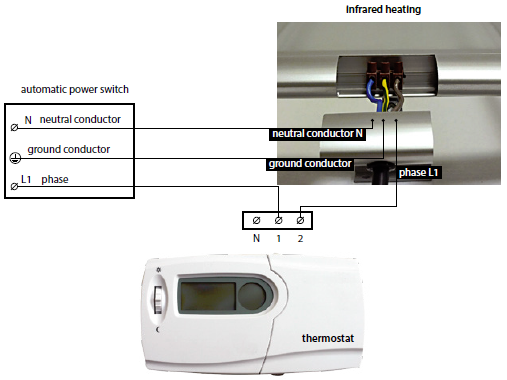
If you have chosen fixed power grid connection for installing your heating unit, please commission a professional to carry out the installation on your behalf. |